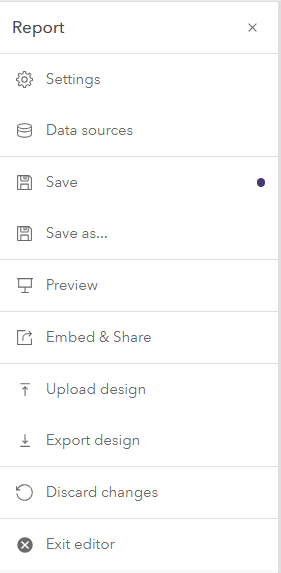
The Report menu provides access to configuration options at the report level (as opposed to the widget level).
Settings
The Report Settings menu allows you to define a series of settings for the report. These are grouped under different headings.
Summary
- Title – the title (or name) of your report as displayed in ArcGIS Online and at the top of the Report Builder editor page
- Snippet – a code snippet that can be added to the index page of the report
- Tags – one or more tags that are applied to the item in ArcGIS Online. Use commas between tags if you wish to add multiple tags e.g. InstantAtlas,Demo,UK
- Description – a description that will be shown on the item details page in ArcGIS Online and also on the index page when the report is viewed
- Locale – the locale that forces how numbers in the report are displayed e.g. with a decimal point if ‘en’ is selected but a decimal comma if ‘es’ is selected.
Features
- ID Field – the attribute field in the base layer for the report that will provide the IDs for the features in the layer. The values in this field should be unique and should be short strings of alphanumeric characters that do not contain spaces, punctuation or special characters (as the IDs are used to build URLs). If you add further data sources to the report, these will also need to contain a field with the same values so that the data can be joined to the correct features. It is therefore important that you think about and choose the correct ID field for your report before you start adding data to widgets.
- Name Field – the attribute field in the base layer for the report that will provide the names for the features in the layer. These will be the feature names used in the report.
Advanced
- Allow core layer override – turn this on if you would like to be able to override the base (or core) layer of the report using a URL parameter.
- Allow local copies – turn this on if you would like it to be possible to save local copies of the report.
- Local copies – storage mode – the storage mode for local copies of the report
Data sources
The Manage Data Sources window displays the data sources attached to a report and enables the addition of further data sources.
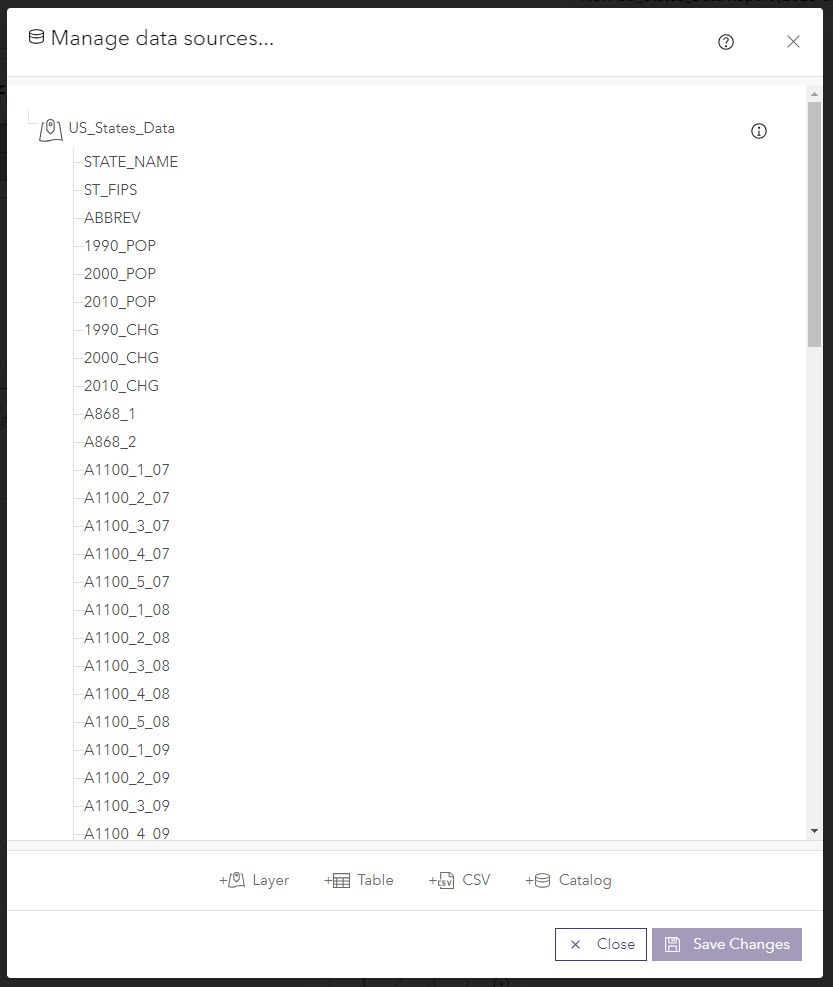
The buttons at the bottom of the window are used to add further data sources that exist in ArcGIS Online.
- Layer – a feature layer with one or more features.
- Table – a table with data for one or more features. For more information visit the Tables page.
- CSV – a CSV file with data for one or more features. For more information visit the CSV page.
- Catalog – an InstantAtlas Data Catalog. If you are a National Data Service customer, or a customer with a subscription to Data Catalog, you will be licensed to access data in a data catalog.
It is a requirement that each further data source that you add has an attribute field that contains exactly the same feature IDs as those in the base layer of the report. If this is not the case, you will see a warning when you add the new data source similar to the one shown below.

Save
Use this option to save the changes to your report (you can also do this by clicking the Save button in the Report Builder editor top panel). If there are unsaved changes in the report, there will be a purple dot next to the Save option. Note that if you are not the owner of the report, clicking Save will open the Save report to window (see below).
Save as
Use this option to save a copy of the report. The Save report to window will open. You will prompted to choose a name for the report and a destination folder in your ArcGIS Online organization.
Preview
Use this option to preview the report. This has the same effect as clicking the Preview button in the Report Builder editor top panel.
Embed & share
The Embed menu provides the information for linking to and embedding your report in a website.
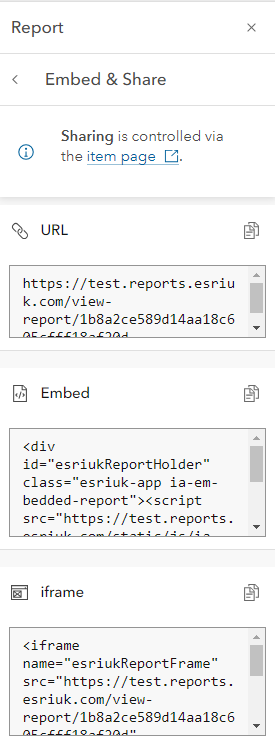
By default a report is not shared and only the owner can view or edit it. To change this, click the link to the item page. In ArcGIS Online, you can use the Share button on the item details page to share the report with your organization, everyone, or set specific group sharing. Note that if you would like end-users to be able to view the report without having to sign in to ArcGIS Online, you will need to share the report with everyone.
Upload design
Use this option to browse for and upload a report design file (JSON). If the file is valid, the report will apply the widget layout and configurations contained in the design file. The report that the design has been uploaded to must be connected to a data source that contains the data used in the widgets contained in the design, otherwise the widgets will not show any data.
Export design
Use this option to export the design for the report as a report design file (JSON). This file is then available for importing into another report.
Discard changes
Use this option to discard all unsaved changes made during the editing session.
Exit editor
Use this option to exit the editor page and return to the home page.