
Contents
The Style Editor interface consists of menus, a toolbar and two panes.
The Menus and Toolbar
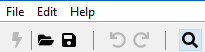
The menus and toolbar give you easy access to the Style Editor options. You can access a menu by clicking on it or holding down ‘Alt’ on your keyboard and pressing the underlined character in the menu name. For example, you can hold down ‘Alt’ and press ‘F’ to access the ‘File’ menu. If you hold your mouse pointer over an option in any of the drop down menus, a tooltip will appear. Similarly, if you hold your mouse pointer over an icon in the toolbar, a tooltip will appear. Note that if you open the Style Editor independently of the Designer, the ‘Apply’ option (first icon in the toolbar) will be greyed out – this is normal as ‘Apply’ is only relevant if you have opened the Style Editor from the Designer.
File
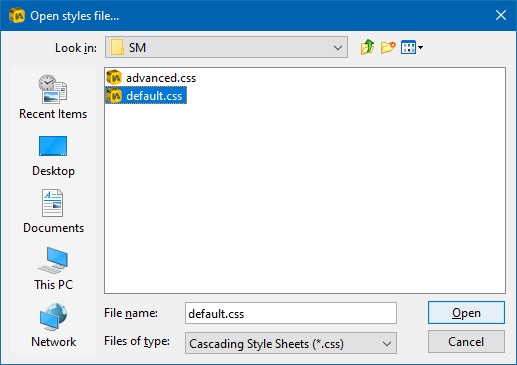
Open
Click ‘Open’ and the ‘Open styles file…’ dialog will appear. Alternatively hold down ‘Ctrl’ and press ‘O’ on your keyboard. Choose the style sheet (called ‘default.css’) for the report you wish to change and click ‘Open’.
You will be warned if there is a problem with the style sheet you are trying to open and given the option to display a log file. E-mail the contents of the log file to your support provider.
Save
Click ‘Save’ to save changes to the open style sheet. Alternatively hold down ‘Ctrl’ and press ‘S’ on your keyboard. When restarted, the dynamic report will reflect any changes that you have made to the style sheet.
Save As
Click ‘Save As’ if you wish to save your changes to a new style sheet. Alternatively hold down ‘Ctrl’ and ‘Shift’ and press ‘S’ on your keyboard. The ‘Save styles as…’ dialog will open. Browse to the folder in which you wish to save your new style sheet, type a name in the ‘File name’ box and click ‘Save’.
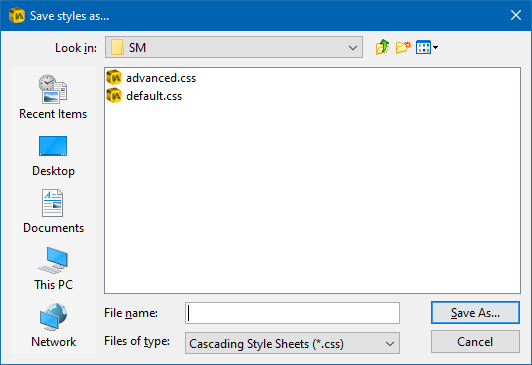
This option is useful if you wish to save different style sheets for a report. Simply save the different style sheets to the report’s folder with names such as ‘default1.css’, ‘default2.css’, ‘default3.css’, etc. Once you have saved these files, you simply choose which one is active by renaming it ‘default.css’. This is because by default an InstantAtlas report looks for a style sheet in its folder called ‘default.css’ and will ignore any others.
Apply
This option is only available if you opened the Style Editor from the Publisher (via the Designer). Click ‘Apply’ when you have made all of your style changes. The changes will be applied to the style sheet of the report you are publishing and the Style Editor will close.
Exit
Click ‘Exit’ to close the Style Editor. If you have not saved your changes, you will be prompted to do so.
Edit
Undo
Click ‘Undo’ to undo changes that you make to the style sheet. Alternatively hold down ‘Ctrl’ and press ‘Z’ on your keyboard. Most changes can be undone in this way. You can click ‘Undo’ multiple times in a row to undo a series of changes. This option will be greyed out if there are no changes to undo.
Redo
Click ‘Redo’ to reapply any changes that you have undone by clicking ‘Undo’. Alternatively hold down ‘Ctrl’ and press ‘Y’ on your keyboard. You can click ‘Redo’ multiple times in a row to reapply a series of changes. This option will be greyed out if there are no changes to reapply.
Help
Help on the Style Editor
Click ‘Help on the Style Editor’ to access the help pages for the Style Editor.
About
Click ‘About’ to open the InstantAtlas ‘About’ window. It contains information regarding your Style Editor application, including the version number and the location of your licence file.
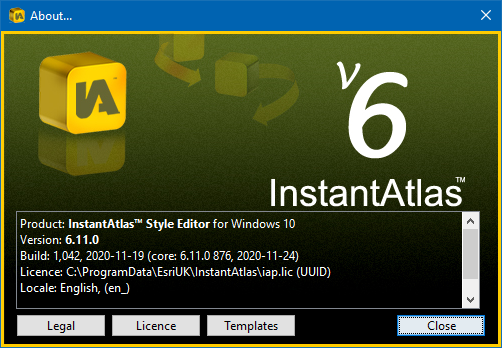
There are also three buttons linking to additional information. The ‘Legal’ button links to the InstantAtlas End-User Licence Agreement. The ‘Licence’ button links to ‘Licence File Information’, from which you can also upload a new licence file. The ‘Templates’ button links to an overview of available templates and also allows new templates to be uploaded.
Find and Replace
Global Property Change tool
Click ‘Find and Replace unique values within this style sheet’ tool to access the property find and replace dialog. This button is found on the right end of the main toolbar found at the top of the Style Editor.
Within the ‘Choose Property…’ dialog, select the property which you would like to globally replace and click OK.
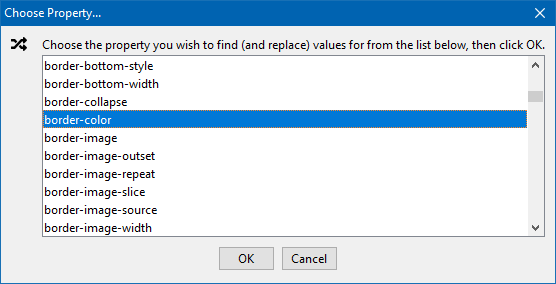
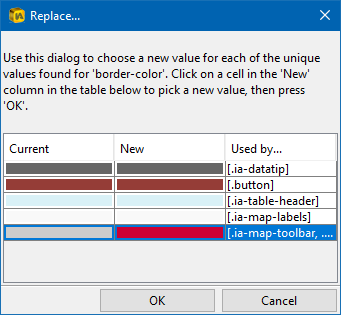
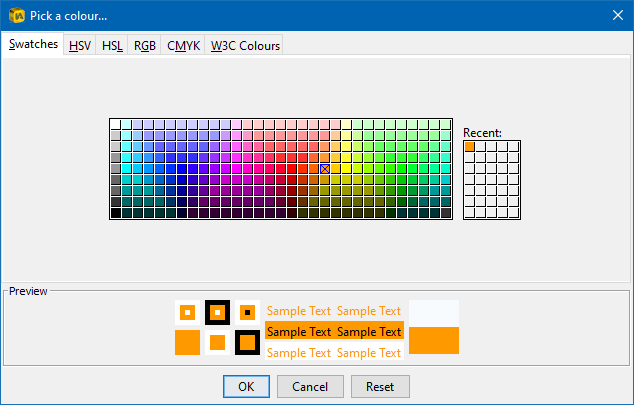
If for example ‘border-color’ is chosen, this will produce the dialog in the screen shot below. Click the colour box within the ‘New’ column. This will open a dialog where you can change the border colour globally throughout the style sheet.
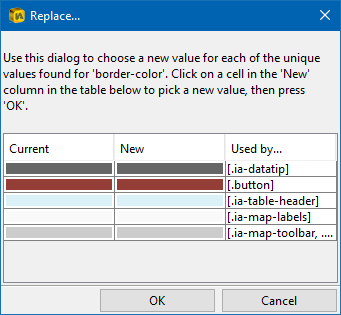
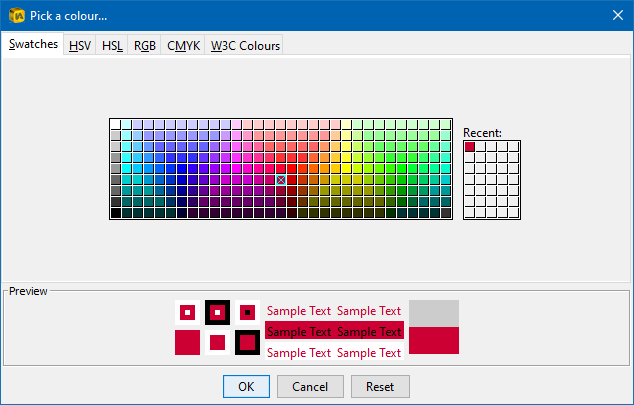
For example if the current light grey border colour property was to be changed to red, click the ‘New’ light grey box which will open the ‘Pick a colour…’ dialog. You can use any of the available tabs (Swatches, HSV, HSL, RGB, CMYK or C Colours) to pick a colour. Recent colours used will be displayed on the right.
Click ‘OK’ in the ‘Replace…’ dialog and the new colour (e.g. red) will be applied to all border colour properties which had the original colour (e.g. light grey).
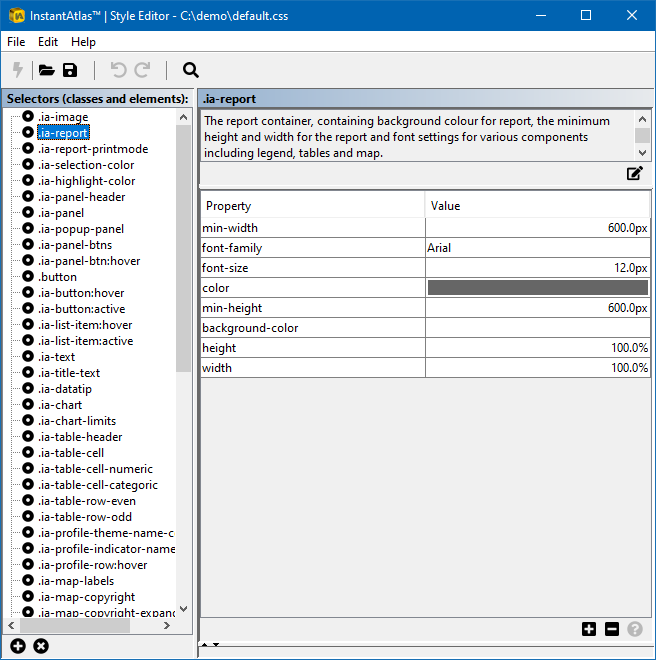
The ‘Classes’ Pane
The ‘Classes’ pane lists the style classes and elements available in the open style sheet. Click on a class to select it.
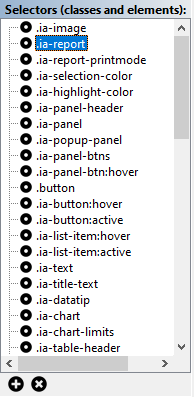
A description for each style class is displayed at the top of the ‘Properties’ pane.
You can drag the right hand border of the pane if you wish to make the ‘Classes’ pane wider. There are two icons at the bottom of the ‘Classes’ pane. The icon on the left allows you to add a new class or element. If you click it, the ‘Create a new style selector’ dialog will appear.
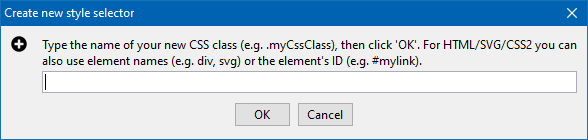
For example, you may have inserted a number of custom text components into your report using the Designer and wish them to be styled the same way. If there is not an existing style that is suitable, you could use the Style Editor to add a new class and create properties for it such as ‘font-family’, ‘font-size’ and ‘color’. You would then ensure your custom text components use the new class by editing the properties for the text component in the Designer (‘Styles’ tab, de-select the custom style and choose your new class from the drop down list).
The icon on the right allows you to remove the selected class or element. You can also access these options by right clicking on a style class in the list. You should not delete any of the default classes unless you are absolutely sure they will not be required otherwise you risk breaking your report.
The ‘Properties’ Pane
The ‘Properties’ pane displays the properties for the style class highlighted in the ‘Classes’ pane, the name of which is displayed at the very top of the panel.
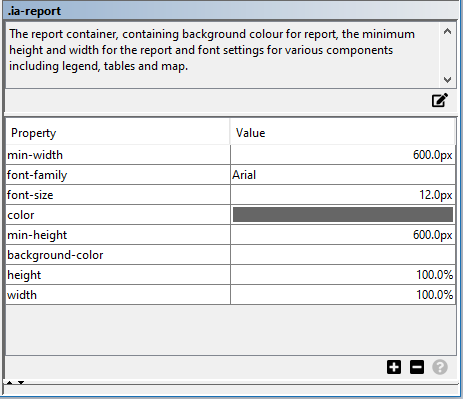
Just below the name of the selected class you can see a description for that class. Below the description is a button that enables you to edit the description. Click the button to open the ‘Edit Description’ dialog.
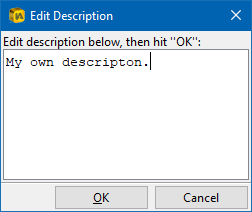
Type your new description and click the ‘OK’ button complete the change.
Properties and their values are listed below. You edit an existing value simply by clicking the cell containing the value. There are three icons in the bottom right corner of the ‘Properties’ pane. The leftmost icon is used to add a new property. Click it to open the ‘Add style property’ dialog.

Click a property and click ‘OK’.
The middle icon is used to delete the selected property. The rightmost icon was used to link to the description of a selected property for our historical SVG templates and is now always disabled.
If you click a colour property the ‘Pick a colour…’ dialog will open. You can use any of the available tabs (Swatches, HSV, HSL, RGB, CMYK or W3C Colours) to pick a colour. Recent colours used will be displayed on the right.
To change the font for text, simply click in the box containing the value for font-family. This will open the ‘Edit Font Families…’ dialog. Choose a Font Family then click OK. If you wish to use a font family that is not available by default you can add another font family using the add button or you can change a currently available font family by double clicking the font family name and selecting the font of your choice.
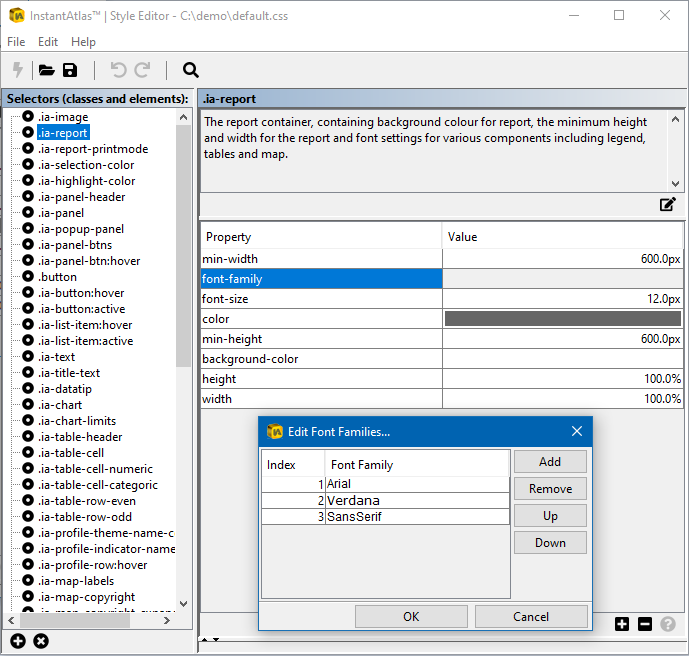
The order of these fonts can be changed by selecting one and clicking the up or down buttons. The order is the order in which the end-user will be able to view the fonts. For example, if the end-user is viewing a dynamic report and they do not have Arial or Verdana available on their computer then the text will show in the font Sans Serif.
When changing the value for font-size you can use the up/down arrows that appear or you can type in a new number and press the ‘Enter’ button on your keyboard.