
Contents
Starting the Publisher
You can start the Publisher by clicking ‘InstantAtlas Desktop Edition’, ‘InstantAtlas Publisher’ in the Windows Start menu or by clicking the ‘InstantAtlas Publisher’ icon on your desktop.

If you chose not to create shortcuts during installation of the software, browse to the ‘InstantAtlasPublisher.exe’ file located in the ‘InstantAtlas’ folder created during the installation of your InstantAtlas software and double click it. The default location of the file is C:\Program Files\EsriUK\InstantAtlas.
The File Menu
The ‘File’ menu at the top of the Publisher currently contains the options described below.
Open Project
Click this option to open an InstantAtlas project file. A project file contains information about your publishing session (e.g. the locations of the files you have uploaded and any settings you have typed in). It can be saved at any point during the publishing process (see below) and then opened during a future publishing session.
Save Project
Click this option to save an InstantAtlas project file. You can save a project file at any point during the publishing process. Normally you would do this at the end of the process when you have made all the changes you wish to save in the project.
Exit
Click this option to exit the Publisher.
The Tools Menu
The ‘Tools’ menu at the top of the Publisher currently contains only one option.
Clear History
This option allows you to restore InstantAtlas Publisher to its default state and will take effect upon re-launching the application. It removes all your recently used files/settings from the drop down lists in the Publisher. Please note that clearing the Publisher’s history cannot be undone. This option should therefore be used only if you have a serious problem using the Publisher and only after talking to your support provider.
The Help Menu
The ‘Help’ menu at the top of the Publisher currently contains the options described below.
Help
Click this option to access the help pages for the Publisher.
About
Click this option to open the ‘About’ dialog. The ‘About’ dialog contains information regarding your Publisher application, including the version number and the location of your licence file.
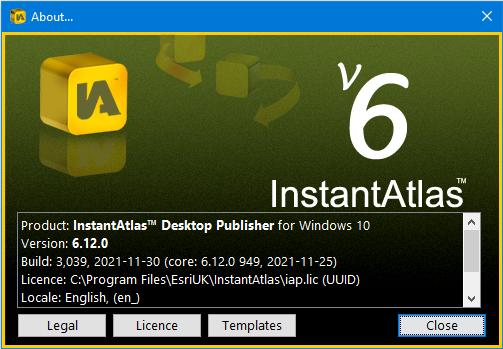
There are also three buttons linking to additional information. The ‘Legal’ button links to the InstantAtlas End-User Licence Agreement. The ‘Licence’ button links to ‘Licence File Information’, from which you can also upload a new licence file. The ‘Templates’ button links to an overview of available templates and also allows new templates to be uploaded.
User Interface Language
The default language for the interfaces of the InstantAtlas tools (Publisher, Designer and Style Editor) is UK English. However, a number of language packs are available and these allow you to display different languages in the interfaces. The US English language pack is automatically added to your computer when you install InstantAtlas. French, German and Spanish language packs are also available for installation on a pack-by-pack basis.
You can choose which packs are installed by choosing an Advanced Install when you install InstantAtlas. You can add or remove packs at any point by modifying your InstantAtlas installation. To do this, access the list of installed programs via the Control Panel, select InstantAtlas and click Change.
You can control the user interface language using the Publisher configuration file (see section ‘Publisher Configuration File’). If no setting exists in this file, the software will detect the regional setting of your operating system. If the language pack matching your regional setting is not installed, the software will default to UK English. You can change the regional setting of your operating system using the Control Panel.