
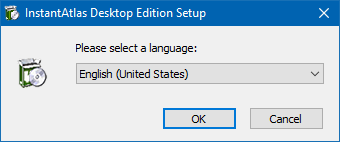
To install InstantAtlas double-click the installer file (.exe) downloaded from our website. You can choose a language for the installation wizard.
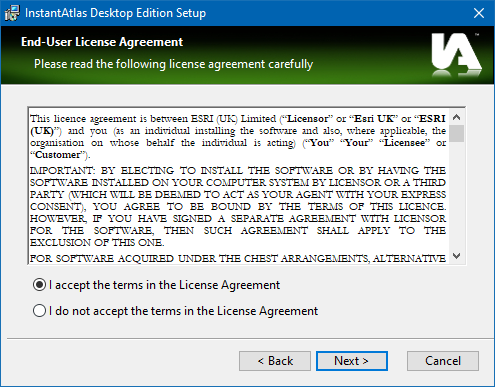
You will be given the option to read and accept the software licence terms.
If you accept the terms, you will then be given the option of a Standard or Advanced installation.
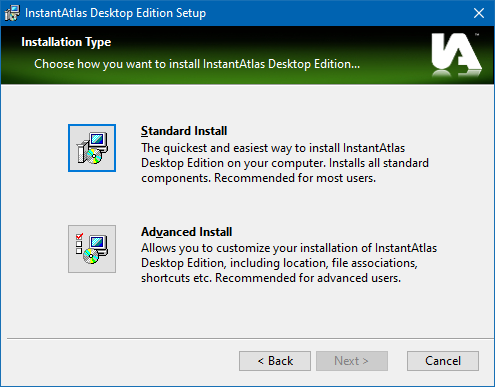
The Standard installation is suitable for most users. You only need to select the ‘Advanced’ installation if you wish to do the following:
- Override the default shortcut settings for InstantAtlas
- Override the default file association settings for InstantAtlas
- Override the default language pack installation settings for InstantAtlas
- Override the default installation location of InstantAtlas
Language packs exist for English (United Kingdom), English (US), French, German and Spanish. The Standard installation will just install the appropriate language pack(s) based on the language you choose for the installation and the language (regional) setting of your computer operating system. The Advanced installation gives you more flexibility over the language packs that are installed.
If you choose the Advanced installation you will be presented with various options.
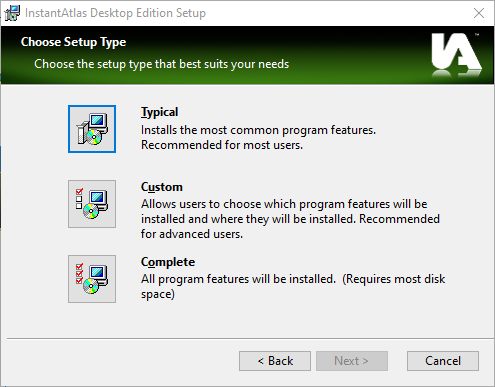
The ‘Typical’ installation is the same as a Standard installation. The ‘Complete’ installation will install all of the language packs. The ‘Custom’ installation will allow you to choose exactly which language packs are installed. With this option you can also change the installation location of InstantAtlas.
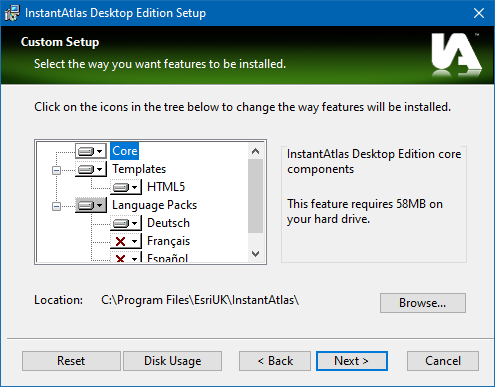
You can click on the red cross ![]() to the left of each language pack you wish to install and select the ‘Will be installed on local hard drive’ option.
to the left of each language pack you wish to install and select the ‘Will be installed on local hard drive’ option.
After the installation, start the InstantAtlas Publisher. You should see the ‘Welcome’ screen as well as ‘Next’ and ‘Back’ buttons that will guide you through publishing your first report.